The same with physical computers that running Windows server, system partition of virtual machines in Hyper-V also runs out of space. In that case, nobody likes to start from scratch, it can't be better if you can extend system partition in Hyper-V vm without losing data. To do this, you need a reliable partition tool. This article introduces how to extend system volume in Hyper-V running Windows Server 2022/2019/2016/2012 safely and easily.
Can't expand system drive in Hyper-V Disk Management
If you run Windows Server 2003 as guest Operating System in Hyper-V, the only native tool is diskpart, which runs from command prompt. In Windows Server 2008 and subsequent versions, there's another Disk Management tool, which has graphical interface. However, neither diskpart nor Disk Management is the best tool, because:
- Both "Extend Volume" function of Disk Management and extend command of diskpart can only expand partition when there's adjacent unallocated space on its right side.
- Both "Shrink Volume" function and shrink command cannot generate required unallocated space.
- Only NTFS partitions can be shrunk and extended, FAT32 is not supported.
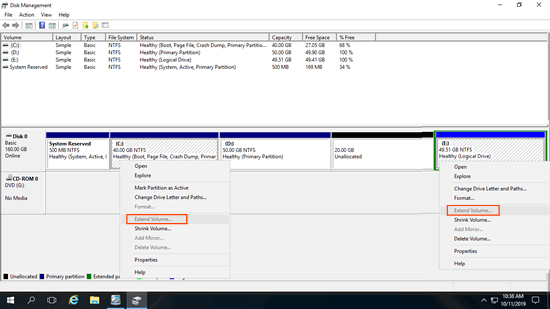
As you see in the screenshot, unallocated space shrunk from drive D is non-adjacent to system C drive and is on the left side of E drive, therefore, Extend Volume is grayed out.
You need 3rd-part disk partition software to help extend system drive in Hyper-V vm.
How to extend system partition in Hyper-V with other virtual partition
Before expanding partition, 2 things you'd better do:
- Open Hyper-V Manager and create a Checkpoint. There's potential system and data damage risk while resizing hyper-v partitions, so you'd better back up or create checkpoint and run safe partitioning software.
- Open guest virtual machine in Hyper-V, run Disk Management to check virtual disk partition layout. (Press Windows and R together on the keyboard, type diskmgmt.msc and press "Enter".)
If there's no other partition or not enough free space in other partitions on the same virtual disk, jump to next section. If there's free unused space in other partitions on the same disk, you can shrink it to get unallocated space, and then add this space to system C: drive.
Steps to extend system partition C in Hyper-V Windows Server 2022/2019/2016/2012:
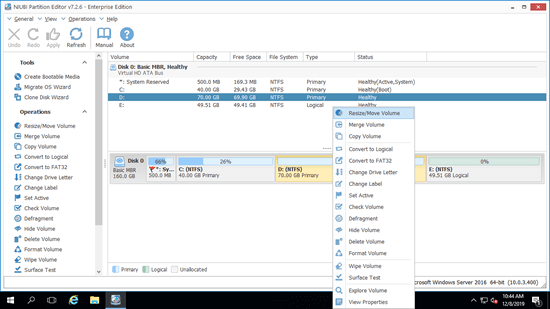
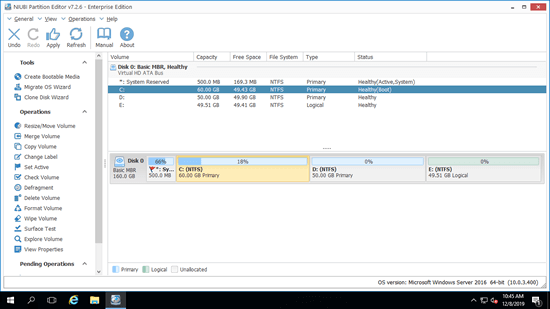
- Download NIUBI Partition Editor and install in Hyper-V guest machine. Right click the right contiguous partition D: and select "Resize/Move Volume".
![NIUBI Partition Editor]()
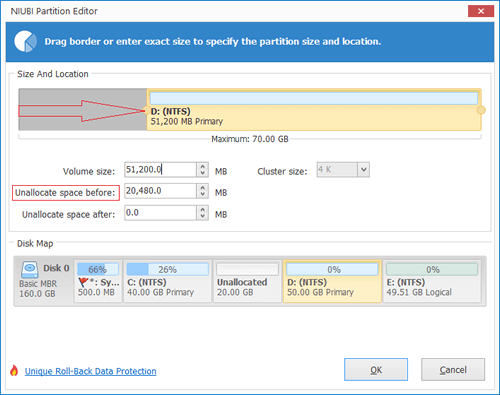
- In the pop-up window, drag the left border towards right, or enter an amount in the box of "Unallocated space before". Then part of free space in drive D will be converted to unallocated behind C: drive.
![Shrink D]()
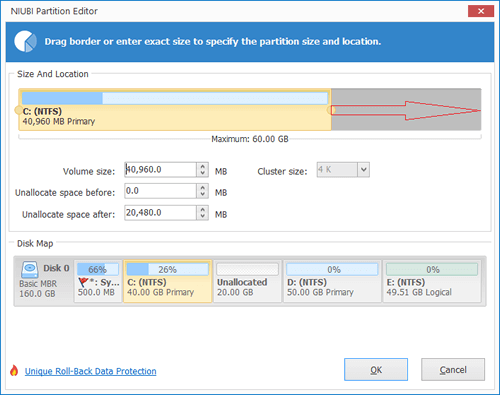
- Right click system partition C: and select "Resize/Move Volume" again, drag right border to combine this adjacent unallocated space.
![Extend C]()
- Click "Apply" on top left to execute, done.
![System volume extended]()
If there's not plenty of free space in the contiguous partition D, you can shrink the non-adjacent drive E. In that case, there's an additional step to move unallocated space behind C drive. Follow the steps in the video to expand system volume in Hyper-V when there's available free space on the same virtual disk.
How to increase system volume after expanding Hyper-V virtual disk
If there's no available free space on the same disk, no software can extend system partition C by adding space from another disk. But better than physical hard disk, you can expand virtual disk in Hyper-V easily. After that, additional space will be shown as unallocated at the end of original virtual disk.
Follow the steps to expand virtual disk and then extend system partition in Hyper-V virtual machine.
Besides resizing and extending partitions, NIUBI Partition Editor helps do other disk and partition management operations.

