How to extend partition on Windows 7
Windows 10 has been released for several years, but many people still use Windows 7. No matter you use Windows 10 or Windows 7, you have to resize and extend partition in certain time, especially for system C drive. Many types of files write into it continuously, it will become full sooner or later. To extend partition in Windows 7, you may use either built-in Disk Management or 3rd-party partition software.
Windows 7 inherited Extend Volume functionality from Windows Vista, which can be used to extend system and data volumes. However, because some limitations, you still need third party partition software. In this article, I’ll introduce how to extend partition in Windows 7 (32 & 64 bit) with Disk Management and free partition manager.
Extend Windows 7 partition in Disk Management
Right-click “My Computer” > “Manage” > “Storage” > “Disk Management”, you’ll see all existing hard disks and partitions.
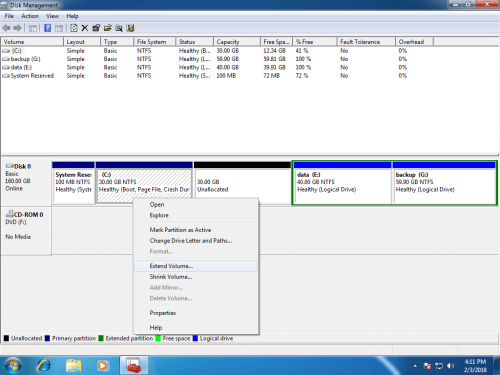
1. Right click C drive and select Extend Volume:
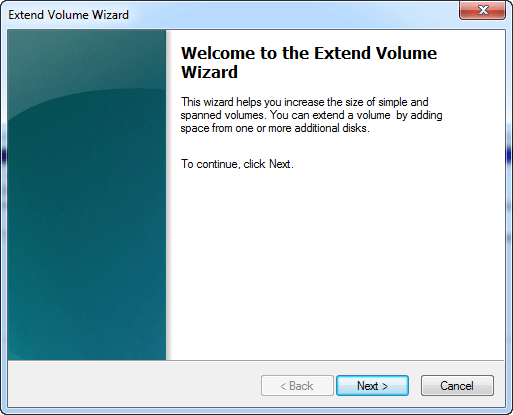
2. Click Next in Extend Volume Wizard window:
3. Available disk and space is selected by default, click Next to continue.
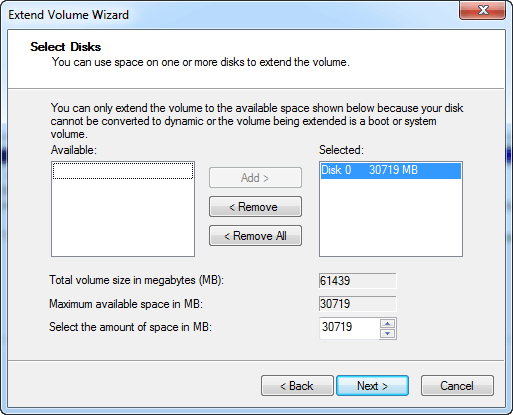
4. Click Finish to confirm the partition extending.
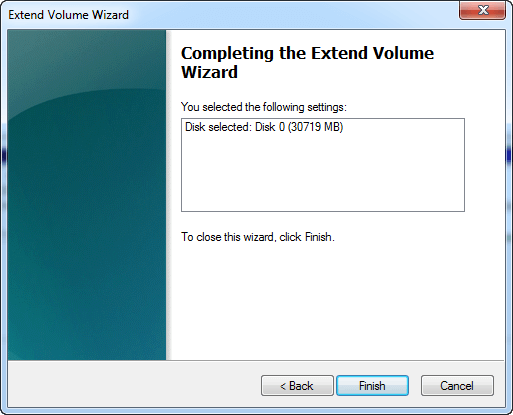
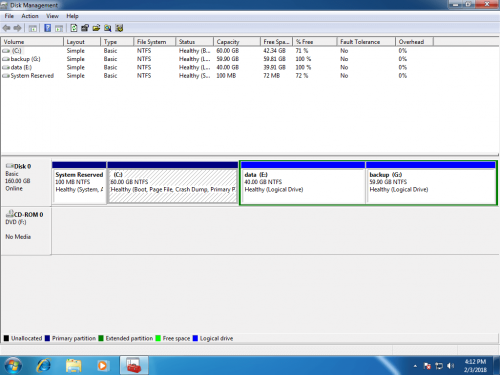
C drive is extended in a while:
Windows 7 Disk Management limitation
It is ease and fast to extend volume in Windows 7 Disk Management, but not every volume can be extended. From Microsoft explanation, to extend a partition with Extend Volume, there must be adjacent Unallocated space on the right side, in addition, this partition should be NTFS, FAT partition is not supported.
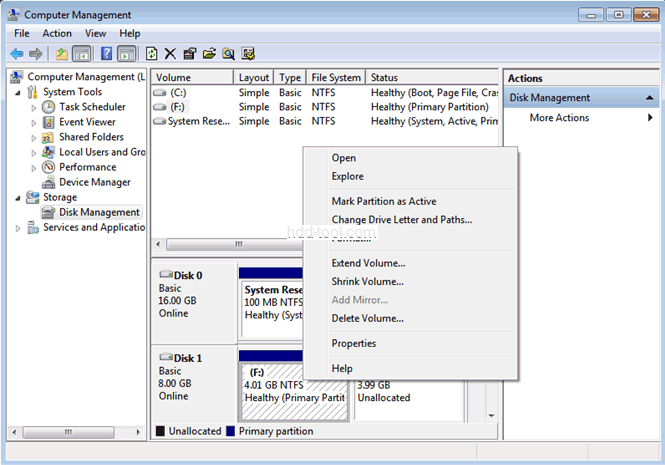
Besides Extend Volume, Shrink Volume is also integrated in Windows 7 Disk Management, so many people try to shrink the adjacent volume such as D to get Unallocated space, but Extend Volume is disabled for C drive.
What about deleting volume D?
If drive D is a Primary partition, the disk space will be converted to Unallocated after deleting, so you can add the space to C drive with Extend Volume. However, all Windows services and programs in drive D stop working, so it is not suggested to extend C drive by deleting D.
If drive D is a Logical partition, the disk space will be converted to Free instead of Unallocated, so you cannot add to C drive directly. Before this, you have to delete all Logical partitions.
To extend partition in Windows 7, third party software is better choice, because there is no such limitation.
Extend Windows 7 volume with free partition software
Better than other free partition software that is locked many functionalities or integrated advertisements or traps, NIUBI Partition Editor Free is 100% free and clean. It supports Windows 10/8/7/Vista/XP (32 and 64 bit), with which you can create, delete, format, resize, move, merge, split, copy, defrag, convert, wipe partition, etc. To extend partition on Windows 7, you just need to click and drag.
Steps to extend volume on Windows 7 with NPE Free:
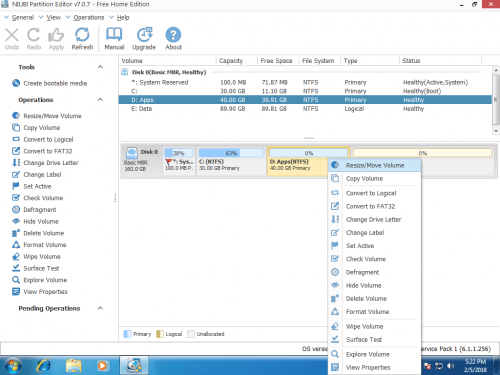
Step 1: Download NPE Free and right click volume D, select Resize/Move Volume feature.
Drag left border rightwards to shrink it in the pop-up window.

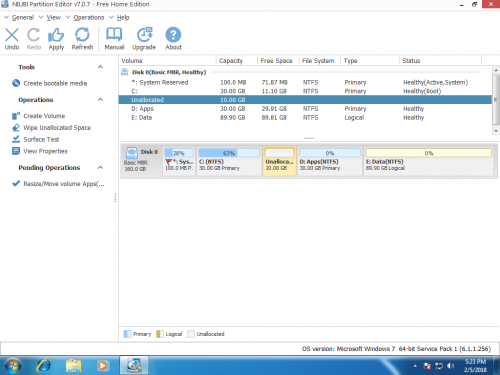
Click OK, it will back to the main window, 10GB free space shrank from D and is displayed as Unallocated behind C drive.
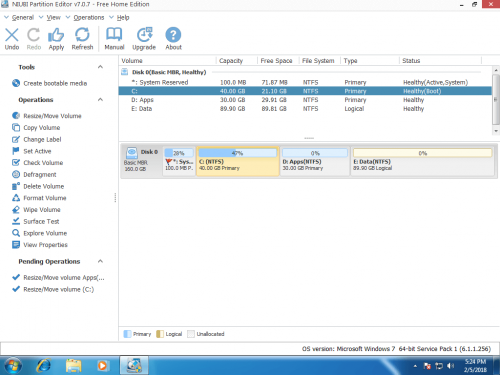
Step 2: Right click C drive and select Resize/Move Volume again, in the pop-up window drag the right border rightwards to combine the Unallocated space.

Step 3: Click Apply on top left to execute, done. (All tasks will be listed in the Pending Operations on bottom left, you can preview, cancel and redo the pending operations. Physical disk drives won’t be changed until you press Apply to confirm.)
What to do if there is not enough free space in adjacent volume D? You can get free space from any other volumes in the same disk, watch the video:
Conclusion
Windows 7 Disk Management has the ability to shrink and extend a partition, but because of the limitations, you cannot extend volume in most conditions, to extend Windows 7 partition, you need third party partition software such as NIUBI Partition Editor. Besides resizing and extending disk drives, you can do many other disk partition management operations.

